


LinkedIn for Freelancers 1: Setting up the perfect profile
Prior to joining Rounded, I spent 5 years working at LinkedIn. I saw first hand how the platform can be misunderstood and often under-utilised. I also saw how effective it can be when used to its full potential. In this 3-part blog series, I’ll explore the ins and outs of LinkedIn.
Article contents
− +
LinkedIn is one of the most polarising social networks out there. It’s a bit like Vegemite – you either love it or hate it!
There’s very rarely a middle ground.
But there are plenty of sole traders who use LinkedIn as their primary source for new leads.
Curious to learn more about how you can use the platform to grow your freelance business? I’ve put some of my best tips together for you.
This article covers the basics of LinkedIn—why it can be so useful and how to set up your profile for success.
If you already know the basics, you might want to skip ahead to our two more advanced instalments in this series:
LinkedIn for Freelancers 2: Beyond the profile
LinkedIn for Freelancers 3: Increasing Visibility
What happens on LinkedIn?
Effective use of any social network starts with understanding who’s there and what they’re doing.
A quick look at LinkedIn’s “About Us” page uncovers the following:
LinkedIn is “the world’s largest professional network, with 756 million members in over 200 countries and territories.”
At its core are the profile pages of those members. There they display, amongst other things, work history, education, skills, blog posts, and examples of their work in many different formats.
Everyone uses the platform in their own way, but in general, LinkedIn is useful for:
Building and maintaining your personal brand
Building your network
Generating new leads
Sharing content with your audience
Engaging with and learning from others
Seeking new job opportunities
Hiring new employees/contractors
Conducting market research
In other words, LinkedIn is a tool for all things related to the working world. But it is still a social network—like the other big platforms, social interactions are at its core.
How do freelancers use LinkedIn?
How you use LinkedIn as a freelancer will largely depend on what you do and where your needs lie.
For example, a designer who does a lot of work for corporate clients might use LinkedIn for business development, building their brand as well as gaining credibility via client recommendations and displaying their portfolio of work.
A digital marketing consultant, on the other hand, might use LinkedIn to find prospects for their business. They will use its search functions to find businesses that need help with marketing and use content and personal outreach to convert those prospects into paying clients.
Whereas for a wedding photographer, branding, business development, and recommendations might be more effective on Facebook or Instagram. Their focus on LinkedIn might be networking with others in the industry, sharing/consuming professional content, contributing to photography groups and discussions, and maintaining an up-to-date profile and portfolio of work.
If you’re trying to decide if LinkedIn is right for you, the best bet may be to hop on the platform and see how others in your industry are using it.
After you log in, just use the search bar at the top to search for phrases related to your industry. Use the word “freelance” in your searches too, and you’ll likely come across a number of freelancers who are already using the platform. Poke around on their profiles, look at their recent posts, and you’ll get an idea of how often they use and for what purposes.
Getting started: Setting up a perfect profile
Regardless of what you do, the most critical aspect of your LinkedIn presence is your profile. You can think of it as your hub—the first place people will visit when they want to know more about you and what you do.
Your profile also has a big impact on how easy it is for people to find you when they’re searching the platform. The words you use on your profile will determine how often you show up in search results. So if you want to use LinkedIn as a lead-building source, it’s important to set it up well!
When you sign in for the first time, LinkedIn makes it pretty easy to start setting up a profile. Here are the important things to focus as you start building it:
1. A professional profile picture
The first thing you’ll want to upload is a profile picture of yourself. LinkedIn’s own research shows “…just having a picture makes your profile 14 times more likely to be viewed by others.”
Above all else, the picture should clearly show your face (no sunglasses or hats), and it should look relatively professional (that beach selfie might not be the right fit).
A simple headshot with a plain background is fine—most phones are capable of taking pretty good photos these days.
Of course, if you want a pro headshot done, that’s fine too. You can also choose a photo that shows more personality with a pop of colour, a big smile, a fun background, etc. It’s up to you—the most important thing is that you’re happy with the photo and it accurately reflects who you are.

Profile shot courtesy of Rachel Smith
*Pro Tip– Smile and make sure your face takes up at least 60% of the frame. Avoid cropped group shots or photos taken after midnight at a party!
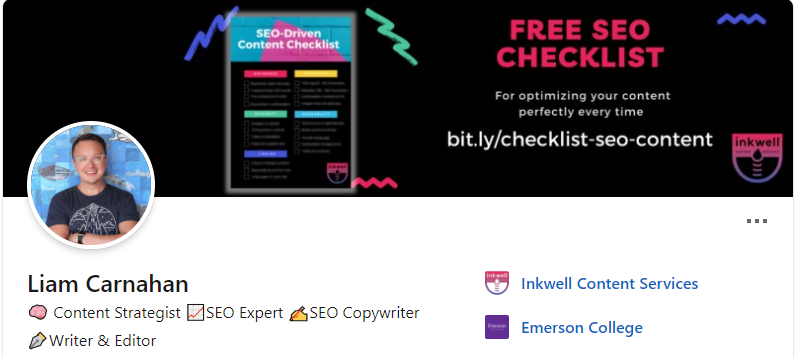
2. An eye-catching cover image
You also have the option to upload a cover image as your backdrop, which is another way to draw attention to your profile and make it more welcome to visitors.
You may just want to put together a simple backdrop using a high-quality image from a site like Unsplash.
But you can also use your backdrop as a chance to give people more information about you and your business at a glance. You can use a platform like Canva to create an image that has text on it, listing your services or pointing people to your website, for example.
3. A descriptive and memorable profile headline
The headline you choose is by far one of the most important elements of your profile. Every time you comment or post on LinkedIn, other users will see your name and your headline.
So your headline should give a clear description of what exactly you do. Many people just list their job title and leave it at that, but you may get more traction from leads if you go a step further.
Why not introduce an element of your own value proposition to make it easier for viewers to understand exactly how you can help them?
*Pro Tip – Check out this blog post on crafting an engaging headline. (NB: I guarantee you’ll hate some of the examples here but the principles are sound – just put your own spin on it).
4. Using your featured section as a portfolio
Next, you’ll see the “Featured” section of your profile. Many freelancers use this as a sort of portfolio—a place to link the best examples of your work.
Depending on what you do, you may want to feature blogs you’ve written, case studies, or images of your work. You can also feature posts you’ve made on LinkedIn here—and the platform will automatically feature your most recent posts. (There’s more about posting on LinkedIn in the third instalment of this series.)
It’s a good idea to refresh the Featured section every once in a while with recent examples of your work.
By the way, we have lots more advice on creating a freelance portfolio here, with some examples to inspire you.
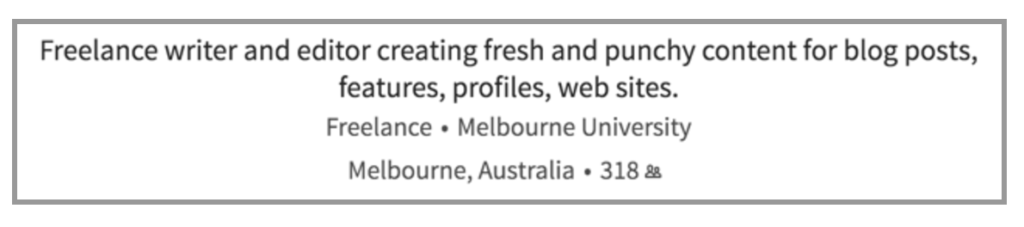
5. Writing up an engaging About section
When people are interested in learning more about you on LinkedIn, the first thing they’ll likely do is click onto your profile and scroll down to your About section.
This section is your big opportunity to show your audience the value you bring to your clients and the passion you have for the work you do.
The key here is to focus the language you use on your customers, their wants and needs, and the solutions you bring.
Take a look at this great example from freelance photographer Gallant Lee:
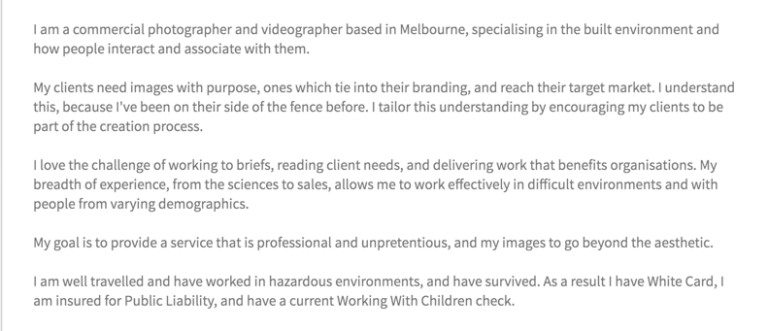
In this example, you can see how Gallant shifts the focus from himself to his customers. He talks about the kind of work he likes to do, while showing his experience and always tying things back to the value he provides.
*Pro Tip – Review this list of top buzzwords to avoid before you start crafting your summary
6. Filling out your experience section
When people want to know the details of your work history, including where you work currently, they’ll turn to the Experience section of your profile.
This section will be a lot like what’s on your CV—you will list the companies you’ve worked for, how long you were there, and what your role/duties were while on the job.
Once again, focus the language you use on the value you brought to these roles. Steer clear of phrases like “duties included” or “responsible for”. Instead, focus on action- and outcome-orientated words such as: created, delivered, led, grew, reduced, saved etc.
If you are running your own freelance business, then your current employer will be the name of your business.
It’s up to you how many jobs and positions you list after your current job. It’s best to stick to the positions you’ve held that are relevant to what you do right now—so your summer job as a lifesaver a few years ago probably doesn’t need to be on there.
You may also find that it’s useful to list some clients you’ve worked with for extended periods of time, especially if your Experience section is looking a little thin.
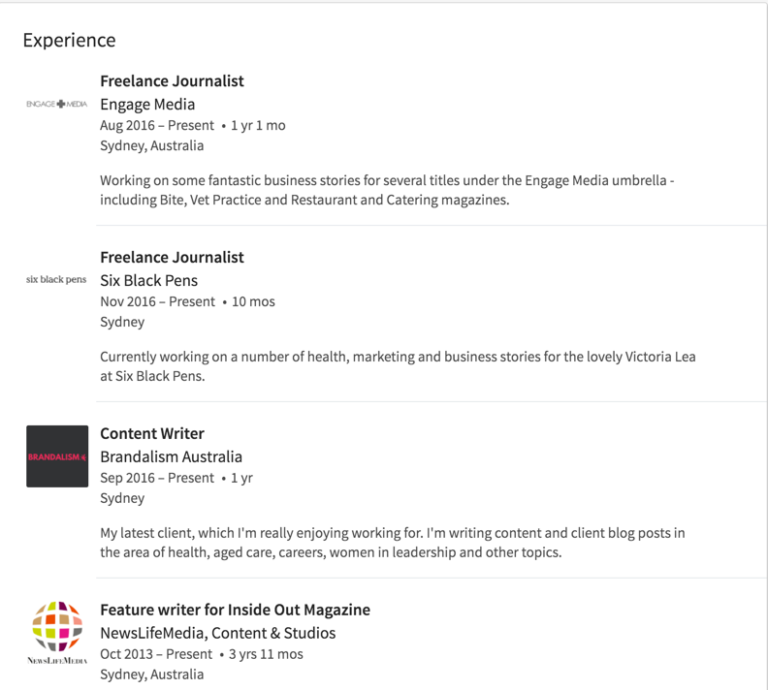
This example from Rachel Smith shows how to structure multiple concurrent roles which as a freelancer or sole trader you may have to do:
In addition to listing out your work experience, you can also include information about your educational background and any volunteer work you've done. It’s a great way to show your passions and well-roundedness.
7. How to fill out your Skills & Endorsements
In this section, you can give your profile viewers a list of your top job-related skills. When you set up your profile, you can choose your top 3 skills, and up to 50 more (though you should probably keep the list closer to 15 - 20 to keep it realistic).
After these are filled out, people will have the opportunity to endorse you for certain skills when they visit your profile. This will happen organically—LinkedIn makes it quite easy to endorse people with one click.
You can also ask your clients and colleagues to endorse you for certain skills. It makes good sense to do this when submitting recommendation requests (which I cover in my next tip).
You can also earn more endorsements by endorsing others. Visit the profiles of people you have worked with, and endorse them for the skills you know they have. It’s highly likely several of them will return the favour.
LinkedIn also lets you take skill quizzes to prove your knowledge and expertise in certain areas. These tests take around 10 - 15 minutes to complete, and they definitely add some benefit to your LinkedIn profile. When you complete a skill quiz successfully, you’ll receive early notifications about certain job opportunities—including contract and remote work. This can give you an edge when looking for new clients on LinkedIn.
8. Using recommendations to prove your value
Used judiciously, recommendations add a lot of credibility to your profile. When you get a recommendation through LinkedIn, it’s posted on your profile and linked to the profile of the person who wrote it. It’s like having a verifiable testimonial right on your profile.
The key to great recommendations are a) timing your request and b) carefully choosing who to ask. You’ll see the text “Ask for a recommendation” right on your profile in the Recommendation section. Select that, and then you can choose the person you want to message along with details on how you know them.When it comes to timing, try to ask for a recommendation as close to successful delivery of a project or piece of work as possible. Capitalise on the warm fuzzy feeling of a job well done or some great feedback.
When you request the recommendation, give some light prompts to your client or colleague about what you’d like them to say. Here’s an example of something you might send:
Hi _______,
I’m so glad to hear you were happy with the design project we worked on. Would you be willing to write a reference for my LinkedIn profile? I’d love it if you spoke about the way your customers are responding to the website’s new design.
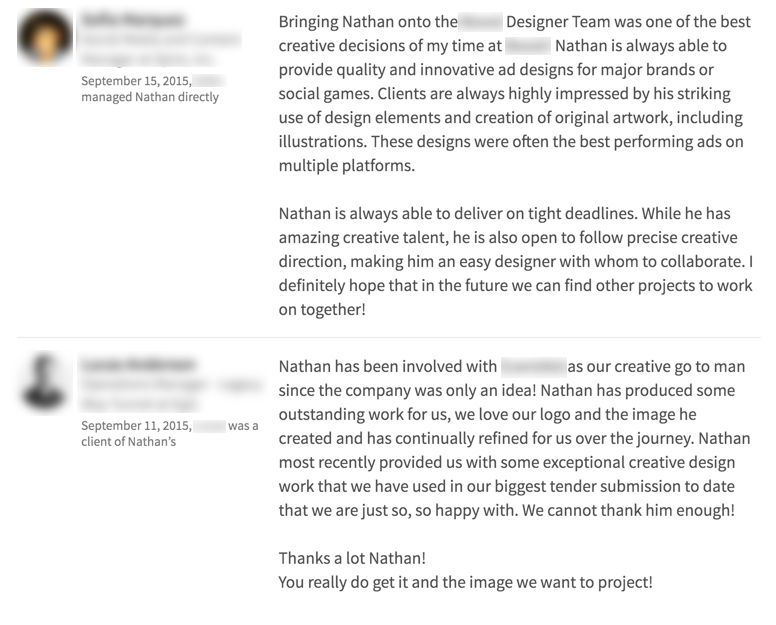
Here are a couple of fantastic examples from Nathan Peyton’s profile:
When thinking about who to ask, steer clear of friends and colleagues who are “happy to help you out”. Instead look for those key clients who will add real credibility to your profile.
*Pro Tip #1 – Always make sure there’s an “out” for the person you request a recommendation from. Some people will just not want to give a recommendation (for whatever reason) and that’s fine. Make it easy for them to say no, rather than risk making them feel uncomfortable which could damage your relationship.
*Pro Tip #2 - When you receive a recommendation on LinkedIn, you can amplify it by reusing it as a testimonial on your website and marketing materials. Just be sure to ask for permission first.
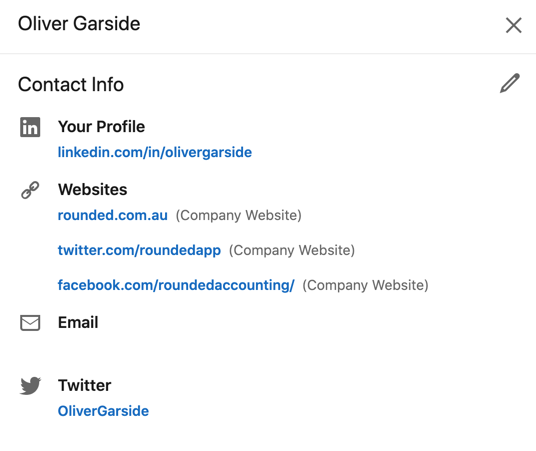
9. Contact Details and links to other platforms
LinkedIn gives you a lot of control over how much information you want people to see when they click on your profile. If you're using the platform for lead generation and network building, it’s a good idea to fill out your contact details thoroughly so it’s easy for leads to reach you.
You may not want to list your phone number or address on your LinkedIn profile, but if you have a website or work email address, you definitely want to put them here. LinkedIn also lets you link your Twitter account if you are active on that platform.
A final thought
Online, just like in the real world, first impressions count for a great deal. If you have a LinkedIn profile that you haven’t looked at in a while, go and take a look. Ask yourself, “If someone who didn’t know me saw my profile for the first time, would I be comfortable/happy with the first impression it gives?”
If the answer is yes, you’re already in a good place. If the answer is no, then hopefully this article will help you make the improvements you want to make.
In part 2 I’ll focus on the more sophisticated features of LinkedIn: company pages, sharing content, various native LinkedIn apps and displaying your portfolio (including using Slideshare.com).
Contents
Join newsletter
ABOUT ROUNDED
Invoicing and accounting software for sole traders. Get paid faster and relax at tax time.